If you’ve ever tried shopping for podcast gear, you already know how overwhelming it can feel. There are endless microphones, headphones, and gadgets out there, each one claiming to be the “best.” Add in the conflicting advice from YouTube videos, blogs, and forums, and it’s easy to get stuck wondering what you actually need.
The truth is, there’s no single “perfect” podcast setup that works for everyone. The right gear isn’t about having the most expensive microphone or the fanciest software. It’s about finding equipment that fits your voice, your recording space, and your podcasting goals.
That’s where having a clear roadmap makes all the difference. Instead of wasting money on trial-and-error purchases, you’ll save time and frustration by choosing gear that truly matches your needs from the very start. At Pure Lighthouse Media, we’ve helped podcasters at every stage. By the end of this guide, you’ll understand exactly how to choose podcast gear that works for your space, your style, and your goals.
Assess Your Recording Space and Goals
Before you buy anything, take time to understand two things: the room where you will record and what you want the podcast to become. Those two factors will shape every equipment decision you make. Pick gear that fits your reality and your goals, and you will save time, money, and frustration.
Why the room matters
Rooms shape sound more than most people realize. Hard surfaces like bare walls, tile floors, and windows create reflections and echo. Soft surfaces like curtains, rugs, and bookshelves absorb and diffuse sound.
- Untreated spaces tend to add reverb, flutter echoes, and background noise. Sensitive microphones will pick these up.
- Treated spaces sound tighter and more controlled. In a treated room you can use more sensitive microphones and capture more detail.
- Background noise matters. Street noise, HVAC hum, and noisy roommates will limit your microphone choices and may force you to record at different times or add acoustic treatment.
Quick tests you can do right now
- Clap test: Clap once in the room and listen for how long the clap rings. A long ring means lots of reflections.
- Record test: Use your phone or a cheap mic and record 30 seconds of speaking. Listen on headphones for echo, hiss, or distant noise.
- Listen at different times: Record during the day and at night to spot intermittent noise sources.
How the room affects mic choice and setup
- Sensitive condenser mics capture more detail and room sound. Use them in quiet, treated rooms.
- Dynamic mics pick up less room ambience and work better in untreated or noisy spaces.
- Mic placement matters: closer placement reduces room pickup and increases presence, but watch for the proximity effect that can boost bass.
Define your podcasting goals
Be honest about what you want from this podcast. Your goals determine how much time and effort to invest in gear and production. Consider three broad paths: hobby, audience growth, and professional brand-building.
- Hobby: Focus on ease of use and low cost. You want something that lets you publish without a steep learning curve.
- Audience growth: You care about consistent, higher-quality sound. You may add co-hosts, guests, or better editing.
- Professional brand-building: You need reliable, studio-quality sound, consistent production workflow, and solutions for live or monetized content.
Why goals matter for equipment and workflow
- If you plan to monetize or run interviews, invest in a workflow that reduces technical risk: backup recording, reliable mics, and a straightforward monitoring setup.
- If you are experimenting, prioritize plug-and-play gear so you can focus on content first.
Questions to ask yourself and what they imply
Write down short answers to these questions and use them to shape your equipment choices.
- Will you record solo or with co-hosts and guests?
- Solo: one mic, simpler routing, easier editing.
- Co-hosts in the same room: look for mics with tight pickup patterns and a way to manage multiple inputs.
- Remote guests: plan for reliable remote recording tools and a way to capture local audio as backup.
- Do you need portability or a permanent home setup?
- Portability: pick compact, robust, plug-and-play gear that is easy to pack and set up on the go. Battery-powered recorders and USB mics are useful.
- Permanent setup: you can choose heavier pro gear, install boom arms, and add acoustic treatment once and for all.
- Is this a creative project or do you intend to monetize?
- Creative project: prioritize getting started and improving over time.
- Monetize or professional use: plan for reliability, consistency, and quality from the start.
What clarity looks like and next steps
When you finish this assessment you should have a short list that answers: room type, recording format, portability needs, and long-term goal. That clarity gives you a practical action plan instead of guesswork.
Simple outcome checklist you can use right now
- Room: Treated or untreated?
- Recording format: Solo, co-located co-hosts, or remote guests?
- Portability: Yes or no?
- Goal: Hobby, grow audience, or professional monetization?
- Quick test recorded: Yes or no?
Examples that tie answers to direction
- Solo in an untreated home office and portability not needed: consider a dynamic mic and close placement, add a pop filter and a boom arm, and plan to do a few room improvements.
- Two co-hosts in the same room and consistent quality wanted: use multiple cardioid mics with an interface or small mixer and treat the room to reduce bleed.
- Remote interviews and portability required: choose a reliable USB mic or portable recorder and set up a workflow for remote recording with local backups.
Final practical step
Record a 30 to 60 second sample in your chosen space and listen carefully on closed-back headphones. If it sounds echoey, try moving the mic closer, adding soft materials, or recording at a different time. If you want guaranteed results, a short equipment consultation can turn your checklist into a tailored plan.
Match Your Needs to the Right Gear
Now that you know your recording space and goals, the next step is to connect those insights to the actual tools you’ll use. The mistake many beginners make is chasing the “best” or most expensive gear without asking if it actually fits their setup. Your gear should be chosen to match your voice, your environment, and your goals, not just your budget.
Let’s break it down piece by piece.
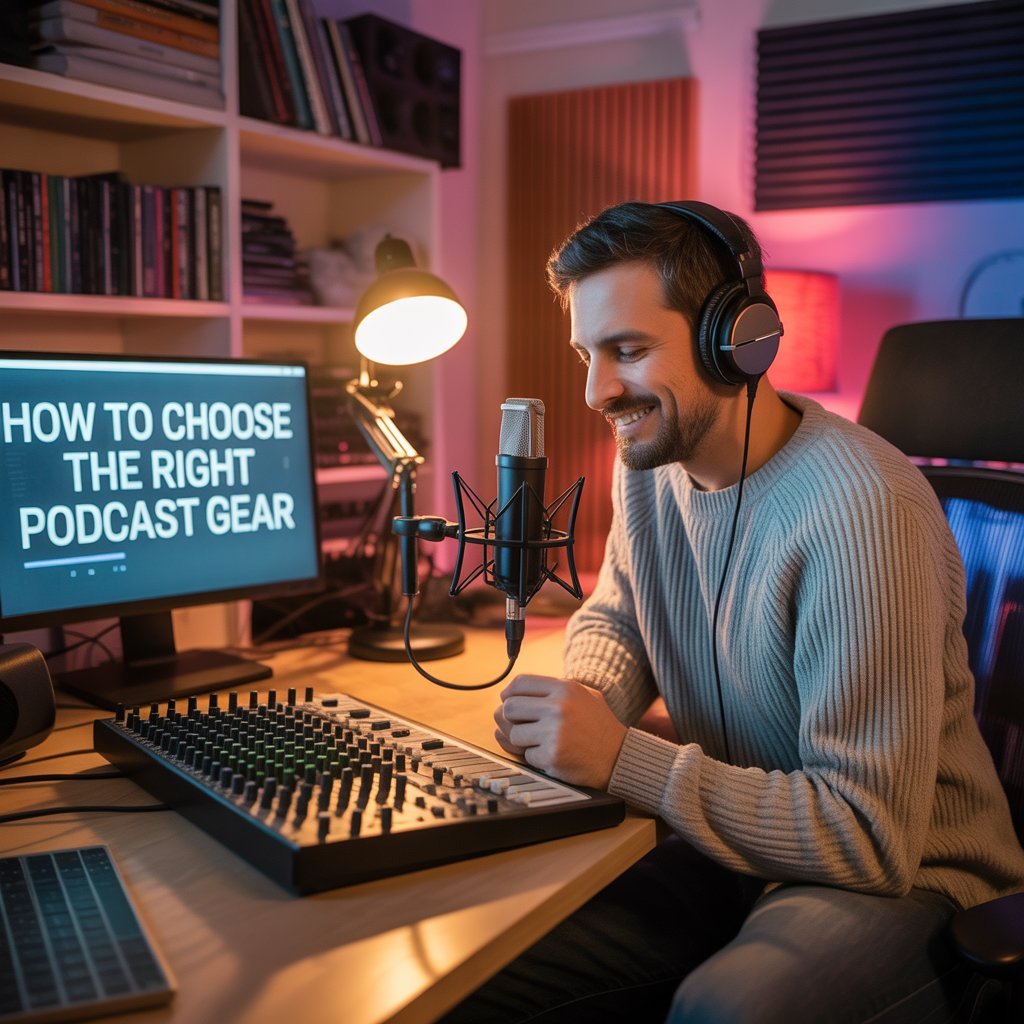
Microphones
The microphone is the heart of your podcast setup, and your choice here has the biggest impact on your sound.
- USB microphones plug directly into your computer. They’re simple, affordable, and perfect for solo podcasters or beginners who want to get started quickly. Think of them as “all-in-one” solutions, no extra gear needed.
- XLR microphones connect through an audio interface. They offer better long-term quality, more control, and the ability to grow into a multi-mic setup. They also last longer and give you flexibility if you decide to upgrade other parts of your studio later.
Quick tip: If your recording space is untreated or noisy, lean toward a dynamic XLR mic, which rejects more background sound. If your space is quiet and treated, a condenser mic can give you more detail and richness.
Headphones
Monitoring your recording with the right headphones makes a huge difference.
- Casual headphones or earbuds often color the sound (boosting bass or treble), which can trick you into thinking your audio is clearer than it really is.
- Closed-back studio monitor headphones are designed for accuracy. They block outside noise and let you hear your voice exactly as it is being recorded, so you can catch background hums, plosives, or distortions in real time.
Think of this as your reality check, if your podcast sounds good in studio headphones, it will sound good almost anywhere.
Audio Interfaces
An audio interface acts as the bridge between your microphone and your computer.
- You only need one if you’re using XLR microphones.
- It converts the analog signal from your mic into digital audio your computer can process.
- Interfaces usually give you better sound quality, more consistent recording levels, and the ability to plug in multiple mics at once.
If you’re starting with a USB microphone, you don’t need an interface right away. But if your long-term goal is audience growth or professional production, an interface is worth considering.
Accessories
Small accessories can make a big difference in both sound and comfort.
- Pop filters or windscreens reduce plosive sounds (like the harsh “P” and “B” noises).
- Boom arms or mic stands hold your microphone steady and keep it at the right height, so you’re not hunched over during long sessions.
- Shock mounts isolate your mic from vibrations (like tapping on the desk or typing on a keyboard), giving your audio a cleaner sound.
These items may feel optional at first, but most podcasters eventually add them to their setup once they realize how much easier they make recording.
Recording Software
Your microphone and interface capture the sound, but you’ll need software to record and edit.
- Free tools like Audacity (Windows/Linux) or GarageBand (Mac) are simple, beginner-friendly, and powerful enough to create quality podcasts.
- Advanced programs like Adobe Audition, Hindenburg, Logic Pro, or Reaper add more editing options, better workflows, and built-in tools for polishing your audio.
A good approach is to start with free software to learn the basics of recording and editing. As your skills and needs grow, upgrading to professional software can save time and give you more creative flexibility.
Common Mistakes Beginners Make
When starting a podcast, it’s easy to fall into the trap of buying gear based on hype, reviews, or what your favorite podcaster uses. But remember: their setup may not be right for your voice, your room, or your goals. Here are the most common mistakes new podcasters make and how to avoid them.
1. Choosing the wrong microphone for their voice or room
Not every microphone suits every situation. A mic that sounds amazing in a treated studio may pick up every hum, echo, and bark of a dog in your living room. Similarly, some mics enhance higher voices while others flatter deeper tones.
- Fix: Test different types of microphones (dynamic vs. condenser) or seek professional advice before investing. A consultation can help you match a mic to your voice and space, saving you money and frustration.
2. Overcomplicating the setup too soon
Many beginners buy multiple pieces of gear—mixers, multiple mics, interfaces—before they’ve even recorded their first episode. This often leads to hours spent troubleshooting instead of creating.
- Fix: Start simple. A single quality mic, headphones, and basic software are enough to learn the fundamentals. Once you’re consistent, you can upgrade and expand with confidence.
3. Ignoring monitoring headphones
Relying on casual headphones or laptop speakers means you won’t hear background noise, distortion, or plosive sounds until it’s too late. By then, re-recording or heavy editing may be your only options.
- Fix: Always record while wearing closed-back studio headphones. They let you hear exactly what your audience will hear, so you can adjust in real time.
4. Spending on extras before mastering workflow
Mixers, fancy plugins, and high-end accessories can look exciting, but without a consistent production routine they add more complexity than benefit. Many beginners buy advanced gear only to feel overwhelmed and discouraged.
- Fix: Build a simple, reliable workflow first. Once you know your process—how you record, edit, and publish—then consider adding extras like mixers or acoustic treatment to enhance your sound.
Outcome
By steering clear of these pitfalls, you’ll save money, avoid frustration, and build a foundation you can grow from. This is also where expert guidance matters: working with professionals like Pure Lighthouse Media helps you skip the trial-and-error phase and start with a setup that’s tailored to your needs.
Why Pure Lighthouse Media’s Tailored Recommendations Save Money
The truth is, buying podcast gear without a plan often leads to wasted money. Many beginners end up purchasing two or three microphones before finding one that actually works for their voice and space. Others buy expensive interfaces or mixers they don’t even need. At Pure Lighthouse Media, we help you skip that trial-and-error cycle and invest wisely from the start.
Personalized gear matching
Not every microphone, headphone, or interface is right for everyone. The gear you choose should match your voice type, recording environment, and long-term goals. We listen to your needs, evaluate your setup, and recommend equipment that’s designed to work for your unique situation.
Smart investment
Our approach is about buying only what you need—nothing more, nothing less. Instead of chasing the “best” or most expensive gear, we guide you toward smart purchases that fit your current stage. That way, every dollar you spend moves you closer to your podcasting goals.
Setup support
Having the right gear is only half the battle. Knowing how to use it is just as important. We help with setup details like microphone placement, gain staging, and workflow organization so you can avoid common mistakes and get clean, consistent recordings from day one.
Peace of mind
Podcasting should be exciting, not overwhelming. With expert guidance, you can stop second-guessing your choices and start focusing on what really matters, creating great content. Our clients often tell us they feel more confident and motivated once their gear is set up correctly and working for them.
Conclusion
The journey to great podcast audio doesn’t start with the most expensive gear—it starts with the right gear for your voice, space, and goals. By understanding your environment, avoiding common mistakes, and choosing equipment that truly fits your needs, you can move from confusion to clarity and from trial-and-error to confidence.
With expert guidance, you’ll save money, skip the frustration, and focus on what matters most: creating content your audience loves.
Book your podcast equipment consultation today with Pure Lighthouse Media.