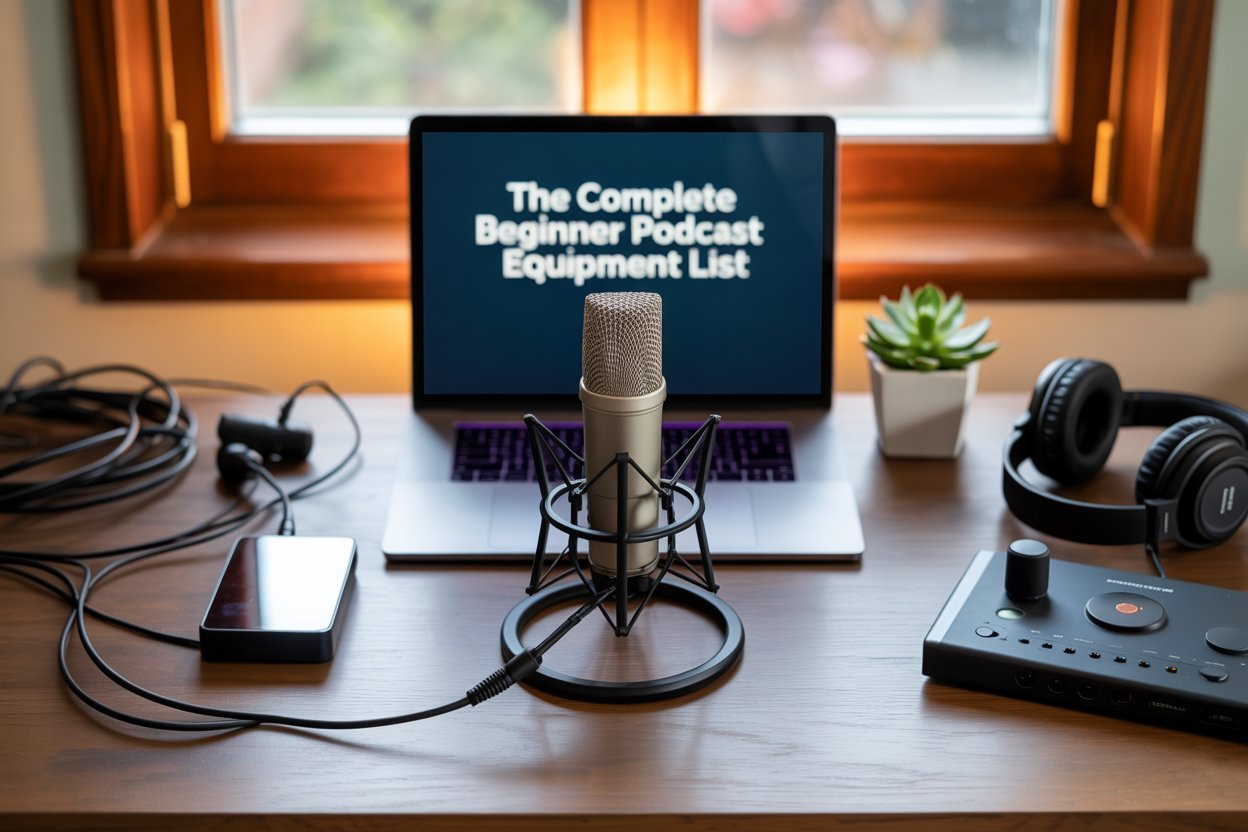
Launching a podcast is exciting, but one of the first challenges beginners face is figuring out which equipment to buy. The truth is that audio quality can make or break your show. Even if your content is engaging, poor sound can distract listeners and keep your podcast from growing. Having the right gear from the start sets the foundation for a professional sound and builds credibility with your audience.
Without a clear plan, many new podcasters waste money on the wrong tools, purchasing gear that doesn’t fit their space, voice, or long-term goals. A clear equipment roadmap helps you avoid that frustration. It saves both time and money while ensuring you focus on creating content instead of troubleshooting poor audio.
This guide walks you through a simple, beginner-friendly podcast equipment list. You’ll learn which items are essential, which extras can help improve your sound, and how to choose based on your budget.
Core Essentials for Every Podcaster
Every podcaster needs a few core pieces of equipment to get started. These items form the foundation of your setup and determine how professional your podcast sounds. While there are countless accessories and extras available, these three essentials are non-negotiable: a microphone, headphones, and an audio interface.
A. Microphone
The microphone is the single most important piece of equipment on your podcast equipment list. Your audience experiences your podcast through your voice, and the quality of that voice depends heavily on the mic you use. A poor microphone can make you sound distant, muffled, or harsh, while a good one gives your podcast clarity, warmth, and presence.
USB vs. XLR Microphones
- USB microphones plug directly into your computer: They are simple to use and ideal for beginners who want a quick, affordable solution. USB mics are great for solo podcasters or hobbyists who want to focus on content creation without technical complications.
- XLR microphones require an audio interface to connect to your computer: They provide higher audio quality, more flexibility, and the ability to expand into a multi-microphone setup. XLR mics are a better choice if you plan to grow your podcast, invite guests, or eventually upgrade to a studio environment.
If you need the best mic recommendation, this blogpost provides all you need to know.
B. Headphones
Headphones are often overlooked by beginners, but they are just as important as the microphone. Without them, you cannot properly monitor your sound, catch background noise, or make accurate edits during post-production.
Why Closed-Back Headphones Are Essential
Closed-back headphones create a seal around your ears, preventing sound from leaking out into the microphone. This isolation ensures that what you hear is true to the recording and that your audio remains clean.
Casual Headphones vs. Studio Monitors
- Casual headphones or earbuds are fine for everyday listening but not accurate for podcast production. They often boost bass or treble, which hides flaws in your audio.
- Studio monitoring headphones are designed to provide a flat, accurate sound. They let you hear exactly what your audience will hear, which is critical when recording and editing.
Audio Interface
An audio interface is only required if you choose an XLR microphone, but it is one of the most important tools for achieving professional sound. It acts as a bridge between your microphone and your computer, converting your analog voice into a digital signal.
What an Interface Does
- Provides power to condenser microphones through phantom power
- Allows control over input gain, which prevents distortion and clipping
- Converts audio signals into high-quality digital recordings
How It Improves Sound Quality and Control
Compared to plugging a mic directly into a computer, an interface ensures cleaner, more accurate sound. It also gives you the ability to fine-tune your audio, especially if you are running multiple microphones for interviews or co-hosted shows.
With these three essentials in place, you can start podcasting with confidence. Everything else, such as pop filters and mixers, enhances the experience, but without a good microphone, a pair of closed-back headphones, and the right interface, your show will struggle to sound professional.
Optional Add-Ons to Improve Your Sound
Once you have your core essentials in place, you can start thinking about accessories that take your audio from “good enough” to truly professional. These items are not required to launch your podcast, but they make a noticeable difference in sound quality, comfort, and consistency. Many experienced podcasters add them over time as their setup and ambitions grow.
Boom Arm or Mic Stand
A boom arm or desk-mounted mic stand is one of the most useful upgrades you can make. It keeps your microphone at a consistent height and distance from your mouth, which is critical for clean, stable audio. Holding a mic or leaving it on a fixed tabletop stand can lead to changes in volume and tone as you move around. A boom arm also frees up desk space, making your recording environment more organized and comfortable.
Benefits:
- Keeps mic in the optimal position for consistent sound
- Reduces handling noise caused by touching or adjusting the mic
- Improves ergonomics, especially during long recording sessions
Pop Filter or Windscreen
Plosive sounds like p, b, and t can cause harsh bursts of air that distort your audio. A pop filter, which is a mesh screen placed between your mouth and the mic, helps diffuse this air and softens those spikes. A foam windscreen fits directly over the microphone and serves a similar purpose, while also reducing hiss and protecting the mic from moisture.
Benefits:
- Reduces distracting “popping” noises
- Improves vocal clarity and listener experience
- Extends the life of your microphone by protecting it from moisture
Shock Mount
Even small vibrations, like typing on your keyboard or shifting your desk, can travel up your mic stand and create unwanted low-frequency noise. A shock mount suspends your microphone in a cradle with elastic bands or rubberized materials, isolating it from those vibrations.
Benefits:
- Prevents rumbling or thumping noises in recordings
- Maintains cleaner audio even in less controlled environments
- Adds stability for professional setups
Mixers
Mixers are not necessary for every podcaster, but they can be game-changing for certain setups. A mixer allows you to connect multiple microphones and adjust each input individually. This is especially valuable for co-hosted podcasts, interviews, or live shows where balancing voices in real-time is important. Some mixers also include built-in effects like compression or EQ, giving you more control over your sound before it even reaches your editing software.
When to Consider a Mixer:
- You host a show with multiple guests or co-hosts in the same room
- You want real-time control over sound levels and effects
- You plan to broadcast live or stream your podcast
You should note that optional add-ons may not be part of your very first setup, but they play a big role in helping your podcast sound polished and professional as you grow. A pop filter or windscreen is a small, inexpensive upgrade that can make a big difference right away, while boom arms, shock mounts, and mixers are excellent long-term investments when you are ready to take your podcast to the next level.
Software Basics: Recording and Editing Tools
Having the right microphone and headphones is important, but your podcast will only sound polished if you also use good recording and editing software. Think of software as your digital toolbox: it captures your voice, lets you clean up mistakes, and helps you shape the final product before it reaches your audience.
The good news is that you don’t need to spend a fortune to get started. There are excellent free options for beginners, as well as professional-grade software if you decide to upgrade later.
Free Recording Options
- Audacity (Windows, Mac, Linux): A popular open-source program that has been around for years. It’s beginner-friendly, free forever, and lets you do all the basics like recording, trimming, cutting out background noise, and exporting files.
- GarageBand (Mac only): Comes free with every Mac computer and is especially useful for podcasters who want an easy drag-and-drop interface. It also has simple music and sound effect tools if you want to add intro music or transitions.
These free tools are more than enough for anyone just starting out. They give you all the basics without overwhelming you with too many buttons.
Paid Options with Advanced Features
If you decide to take your podcasting more seriously, you may want to invest in paid software. These programs offer extra features that can save time, improve sound quality, and give you more creative control.
- Adobe Audition: Part of Adobe Creative Cloud. Offers professional tools like advanced noise reduction, multitrack editing, and audio restoration.
- Hindenburg Journalist: Designed specifically for podcasters and radio producers. It focuses on voice recordings and makes editing interviews or multi-track shows much easier.
- Logic Pro (Mac only): A full professional studio in software form. Great for podcasters who also want to work with music or sound design.
- Reaper: Very affordable compared to other professional tools, yet extremely powerful and customizable. It’s a favorite among advanced podcasters who like flexibility.
Editing Basics Every Podcaster Should Know
No matter what software you choose, the main editing steps are usually the same:
- Trimming: Cut out mistakes, long pauses, or off-topic parts to keep your episode sharp and engaging.
- Noise Reduction: Reduce background hum, clicks, or static to make your voice sound cleaner.
- EQ (Equalization): Adjust the balance of high, mid, and low tones in your voice so it sounds natural and pleasant.
- Compression: Smooth out volume differences so your audience doesn’t have to constantly turn the volume up and down while listening.
You don’t need to master everything at once. Even learning trimming and noise reduction will make a huge difference at the start.
Recommendation
As a beginner, it is easy to feel overwhelmed by all the software options out there. The best approach is to start with a free program like Audacity or GarageBand and get comfortable with basic recording and editing. Once your podcast grows and you feel limited by those tools, that is the time to upgrade to a paid option.
This way, you save money, learn the basics without stress, and make smarter choices when investing in professional tools.
Budget Tiers: What to Buy at Each Level
One of the biggest challenges for new podcasters is figuring out how much to spend on equipment. The truth is, you don’t need to break the bank to sound good. What matters most is buying the right gear for your current stage. Below, we’ll break down three budget paths so you can choose the one that fits your goals.
A. Starter Setup (Under $150)
If you’re just testing the waters or podcasting as a hobby, this is where you should begin. A starter setup gives you all the essentials without unnecessary extras.
What you’ll need:
- USB Microphone: A simple plug-and-play mic like the Samson Meteor Mic or Blue Snowball iCE. These are affordable and require no extra equipment.
- Headphones: A basic but reliable pair, such as the Audio-Technica ATH-M20x, so you can monitor your sound while recording.
- Free Editing Software: Programs like Audacity (PC/Mac) or GarageBand (Mac) will let you record and edit without spending a dime.
Who it’s for: Hobbyists, first-time podcasters, or anyone doing a trial run before committing more money.
B. Intermediate Setup ($150–$500)
At this stage, you’re taking podcasting more seriously and want higher-quality sound with more flexibility. This setup is ideal if you plan to grow your show, record with guests, or produce episodes more consistently.
What you’ll need:
- XLR Microphone: Something like the Audio-Technica AT2020 or Rode PodMic. These deliver better sound and are a step up from USB mics.
- Affordable Audio Interface: A device like the Focusrite Scarlett Solo or Behringer UMC22, which connects your XLR mic to your computer.
- Closed-Back Monitoring Headphones: Upgrade to reliable options such as the Sony MDR-7506 for accurate sound monitoring.
- Accessories: Add a pop filter to reduce plosives and a boom arm to keep your mic in the right position.
Who it’s for: Podcasters who are serious about growth, co-hosted shows, or anyone planning to improve their production quality without going pro just yet.
C. Professional Setup ($500+)
This tier is for podcasters who are committed to podcasting long-term, already have an audience, or are building a show for business purposes. Here, you’re investing in broadcast-level equipment that matches industry standards.
What you’ll need:
- Broadcast-Standard Microphone (XLR only): Options like the Shure SM7B or Electro-Voice RE20, trusted by top podcasters worldwide.
- Quality Interface or Mixer: Interfaces like the Focusrite Scarlett 2i2 or mixers like the Rodecaster Pro, which not only provide excellent audio quality but also give you more control over levels, effects, and multiple inputs.
- Full Accessories: Shock mount, boom arm, pop filter, and even basic acoustic treatment (like foam panels or portable vocal booths) to control room echo.
- Professional Software: Consider upgrading to Hindenburg or Adobe Audition for advanced editing and production tools.
Who it’s for: Established podcasters, businesses, or monetized shows where professional sound quality is a must.
The good news is that you don’t need to start with the most expensive gear. Match your equipment to your current stage and upgrade as your podcast grows. Start simple, get comfortable, and invest more as your goals and audience expand.
Where to Get Help With Setup and Equipment Consulting
One of the most common struggles new podcasters face is figuring out which gear actually works for their unique situation. It is easy to get caught up in flashy reviews or recommendations from other creators, only to realize later that the microphone you bought does not suit your voice or that your room acoustics make your expensive gear sound worse than expected.
Common Beginner Mistakes
- Buying the wrong microphone for the wrong room: Some mics pick up every sound in an untreated space, making recordings echoey or full of background noise.
- Not matching gear to your voice: Different microphones complement different voice types. A mic that makes one podcaster sound warm and clear might make another sound flat or harsh.
- Over-investing too early: Beginners sometimes spend hundreds of dollars on equipment they don’t yet need, only to feel overwhelmed by complicated setups.
These mistakes cost both time and money and often lead to frustration that could easily be avoided with the right guidance.
Why Professional Consultation Helps
Getting advice from someone who understands both the technical side and the beginner’s perspective can save you from costly errors. A consultation helps you:
- Choose the right mic for your voice and space
- Build a setup that fits your budget and future goals
- Learn how to arrange your recording environment for the best sound
- Avoid buying unnecessary gear that adds little value to your production
Instead of guessing or relying on trial and error, you can start strong and feel confident that your investment is truly supporting your podcast journey.
How Pure Lighthouse Media Can Help
At Pure Lighthouse Media, we specialize in helping new podcasters from the very first step. Whether you are trying to choose between a USB and XLR microphone, set up a small home studio, or figure out which accessories are worth buying now versus later, we guide you through the process with clarity and care.
We offer:
- Tailored equipment recommendations based on your voice, room setup, and budget
- Studio setup services to help you create a professional recording space, even at home
- One-on-one consultations so you can ask questions and avoid common pitfalls
Our goal is simple: to help you start podcasting with confidence, knowing that every piece of gear you buy is the right fit for you.
Conclusion
Starting a podcast may feel overwhelming at first, but with the right podcast equipment list, anyone can create a show that sounds professional from day one. From choosing a reliable microphone and headphones to adding optional upgrades and learning the basics of editing software, the path becomes much easier when you know exactly what to look for.
The key is not to guess or overspend on gear that may not fit your needs. Instead, invest wisely, grow at your own pace, and focus on creating content your audience will love.
If you want to avoid trial and error and get started with confidence, expert guidance can make all the difference.
Book an equipment consultation with Pure Lighthouse Media today and let us help you build the perfect setup for your voice, your space, and your podcasting goals.